An organized kitchen doesn’t have to come with a hefty price tag. With a little creativity, smart decluttering, and affordable storage solutions, you can create a space that’s both functional and beautiful. Whether you’re tackling cluttered cabinets or searching for budget-friendly ways to maximize your storage, these tips will help you turn your kitchen into a stylish and efficient haven.
Did you know that 80% of kitchen organization experts recommend slide-out storage for tricky spots? Affordable options like dollar store bins, hooks for mugs and utensils, and uniform spice containers can make a huge difference in maintaining a neat and cohesive look.
By embracing these strategies, you can keep your kitchen organized without breaking the bank. Simple tools like reusable food bags not only save space but also keep your food fresh—something 70% of experts swear by. These small changes add up to a kitchen that’s easier to cook in, more enjoyable to host in, and a joy to come home to.

Declutter Your Kitchen for a Fresh Start
Embarking on a kitchen decluttering journey might feel daunting, but it’s a rewarding process that transforms your space into a functional and inviting area. A decluttered kitchen simplifies cooking, reduces stress, and brings joy to daily tasks. Here’s a step-by-step guide packed with tips, tricks, and examples to make your decluttering process smooth and efficient.
Step 1: Empty Cabinets and Drawers for a Clean Slate
Take everything out of your cabinets, drawers, and pantry. Starting fresh allows you to assess what you truly have and gives you the space to reorganize effectively. Lay everything out on a clean surface like your dining table or countertop.
Tips & Tricks:
- Work in sections (e.g., one cabinet or drawer at a time) to stay focused and avoid overwhelming messes.
- Use a large box or bin labeled “Donate” to quickly sort items you no longer need.
- Take this opportunity to wipe down shelves and drawers with a gentle cleaner or vinegar solution before putting anything back.
Pro Tip: Line your cabinets and drawers with peel-and-stick liners to protect surfaces and add a touch of style.
Step 2: Categorize Items by Function or Usage
Sorting items into categories makes it easier to see what you have too much of and what’s missing. Common categories include baking tools, cooking utensils, small appliances, pantry staples, and cleaning supplies.
Tips & Tricks:
- Group similar items together: measuring cups with spoons, spatulas with whisks, and so on.
- Use clear bins or baskets to store smaller grouped items, like seasoning packets or tea bags, for easy access later.
- Create a “daily essentials” zone for the items you use most often, such as your coffee maker, favorite mug, and sugar canister.
Pro Tip: Label baskets and bins for easy identification, especially if you share the kitchen with others.
Step 3: Donate or Toss Unused Kitchen Gadgets
Decluttering is as much about letting go as it is about organizing. Evaluate each item critically: If you haven’t used it in the past year, chances are you don’t need it.
Popular Items to Declutter:
- Old Plastic Containers: Toss those with missing lids, warping, or stains.
- Chipped Plates or Mugs: Replace these with durable and safe alternatives.
- Rarely Used Small Appliances: Do you really need that yogurt maker or second blender?
- Duplicate Tools: Keep one good can opener, spatula, or whisk\u2014you don’t need multiples!
- Expired Pantry Goods: Check expiration dates and toss anything past its prime.
Tips & Tricks:
- Donate gently used items to local charities, shelters, or community groups.
- Recycle worn-out plastic containers or mismatched lids to free up space.
- For sentimental items, like Grandma’s pie pan, consider keeping just one meaningful piece and letting go of duplicates.
Pro Tip: If you feel guilty about unused purchases, remember you’re creating a space for items you actually use and love.

Step 4: Keep Counters Clear with Minimalistic Principles
Your countertops are prime real estate in the kitchen, so keep them functional and clutter-free. Only display items you use daily or that add aesthetic value to the space.
Tips & Tricks:
- Use wall-mounted solutions like magnetic knife strips or hanging racks to free up counter space.
- Store bulky appliances like stand mixers in lower cabinets and only bring them out when needed.
- Add a decorative tray to group frequently used items, like olive oil, salt, and pepper, for a neat and intentional look.
Pro Tip: Create a designated “drop zone” for mail, keys, and other non-kitchen items to prevent them from cluttering your counters.
Extra Tips for Success:
- Set a Timer: Dedicate 15-30 minutes daily to decluttering so you don’t get overwhelmed.
- Adopt a One-In-One-Out Rule: For every new item you bring into your kitchen, remove an old or unused one.
- Take Before-and-After Photos: Document your progress for motivation and to celebrate your success.
Why It Matters:
A clean, organized kitchen isn’t just about appearances. It saves time, reduces stress, and makes cooking and hosting more enjoyable. Decluttering is an ongoing process, but with these steps and tricks, you’ll be set up for success.

Budget-Friendly Storage Solutions
Creating a well-organized kitchen doesn’t have to cost a fortune. With a little creativity and some affordable tools, you can maximize your space and keep everything tidy. From dollar store finds to clever DIY solutions, these budget-friendly ideas will transform your kitchen into a functional and stylish space.
5. Use Dollar Store Bins for Affordable Storage
Dollar store bins are a game changer when it comes to affordable kitchen organization. They’re perfect for storing utensils, snacks, cleaning supplies, or even spices, and they come in various sizes and colors to suit your style.
Tips & Tricks:
- Use small bins to group seasoning packets, tea bags, or single-serve snacks in your pantry.
- Opt for stackable bins to save space in deep drawers or on shelves.
- Add labels to your bins for a polished, easy-to-navigate look.
Pro Tip: Look for bins with lids to keep items like flour or sugar fresh and pest-free.
6. Install Hooks for Mugs and Utensils
Hooks are a simple yet effective way to free up cabinet space while keeping frequently used items within reach. Whether installed under shelves, on walls, or inside cabinet doors, hooks are versatile and easy to use.
Tips & Tricks:
- Hang mugs under shelves to double your storage space for glassware.
- Use adhesive hooks for lightweight items like pot holders or measuring spoons.
- Try decorative hooks to add style to your storage solutions.
Pro Tip: Install a row of hooks near your coffee station to create a dedicated mug zone.
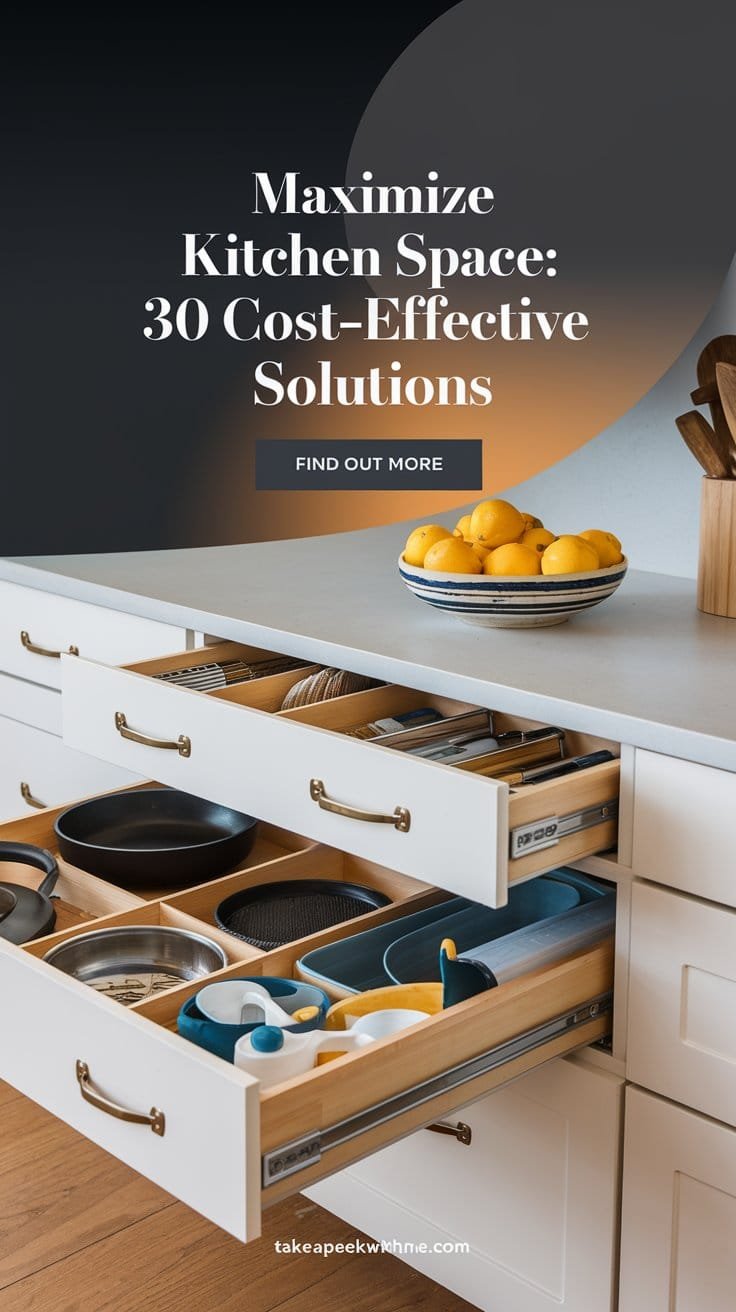
7. Store Plates in Drawers for Space Efficiency
Switching from cabinets to drawers for plate storage not only saves space but also makes accessing your dishes easier. Deep drawers equipped with dividers can securely hold plates, bowls, or platters.
Tips & Tricks:
- Use adjustable plate dividers to prevent plates from sliding or chipping.
- Arrange plates by size, with frequently used ones at the front for easy access.
- Add a drawer liner to keep everything in place.
Pro Tip: Store everyday dishes in lower drawers so they’re easily accessible for the whole family.
8. Add Shelf Risers to Maximize Cabinet Space
Shelf risers are a must-have for creating extra storage in cabinets. They allow you to stack items like plates, cups, or canned goods without wasting vertical space.
Tips & Tricks:
- Use risers in cabinets to stack mugs or bowls while keeping them easy to grab.
- Opt for clear risers to maintain a clean and open look in your cabinets.
- Pair risers with bins or baskets to further maximize space.
Pro Tip: Adjustable risers work best if you have cabinets with varying shelf heights.

9. Install Pegboards to Organize Kitchen Gadgets
Pegboards aren’t just for the garage—they’re a fantastic way to organize pots, pans, and utensils in your kitchen. They keep your tools visible and within easy reach while saving drawer and cabinet space.
Tips & Tricks:
- Use hooks on the pegboard to hang measuring cups, whisks, or ladles.
- Paint the pegboard in a bold color to turn it into a decorative feature.
- Add small baskets to hold spices or small gadgets.
Pro Tip: Install a pegboard on the inside of a pantry door or unused wall for a stylish and functional storage solution.
Popular Budget-Friendly Storage Solutions
| Storage Solution | Cost | Benefits |
|---|---|---|
| Dollar Store Bins | $1–$5 | Affordable, versatile, and available in various sizes and colors |
| Hooks for Mugs and Utensils | $5–$10 | Convenient, space-saving, and easy to install |
| Shelf Risers | $10–$20 | Maximizes cabinet space, adjustable, and easy to use |
| Pegboards | $15–$30 | Keeps kitchen gadgets organized and within reach, customizable |
Final Tips for Budget Storage:
- Think Vertical: Use wall space for hanging tools, spice racks, or even small shelves.
- Repurpose Items: Transform items like mason jars or magazine holders into storage for utensils or cutting boards.
- Declutter First: Before adding storage solutions, clear out unnecessary items to make the most of your space.
By incorporating these budget-friendly solutions, you’ll not only save money but also create a kitchen that’s organized, efficient, and stylish. The key is to be resourceful and make the most of what you have!

Organizing Kitchen Drawers
Kitchen drawers are the unsung heroes of a well-organized kitchen. When arranged thoughtfully, they boost efficiency and make meal prep a breeze. The key is to set up a system that ensures everything has its place, from utensils to plates. With the right tools and strategies, you can transform even the messiest drawers into organized spaces that work for you.
10. How to Organize Kitchen Drawers for Maximum Space
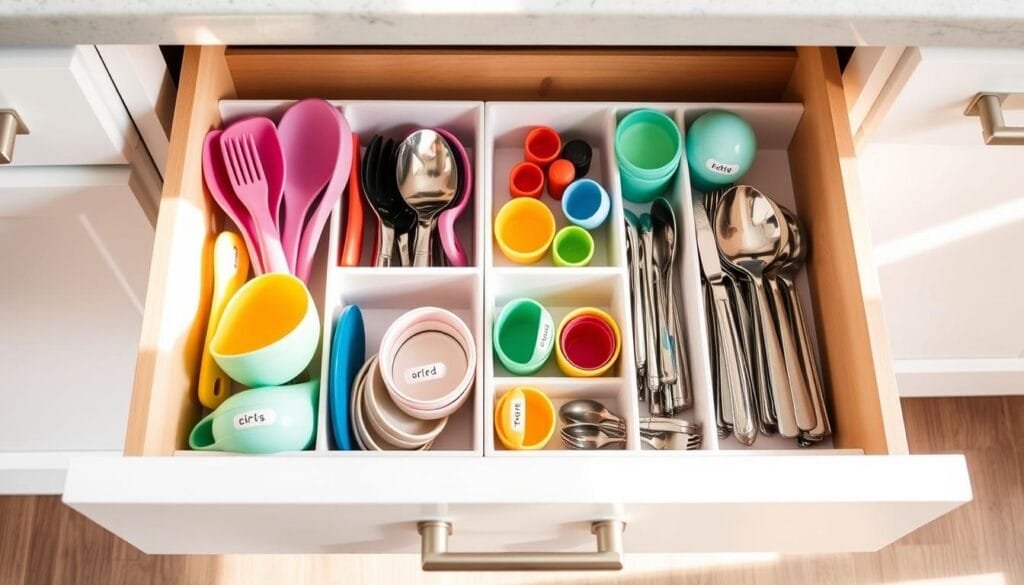
Drawer dividers are a must for creating an organized, clutter-free system. They help separate utensils, gadgets, and tools so you can find exactly what you need when you need it.
Tips & Tricks:
- Choose adjustable dividers to fit drawers of different sizes.
- Dedicate specific sections for items you use together, like a section for spatulas near your stove.
- Group items by frequency of use—store less-used tools toward the back.
Pro Tip: Use bamboo or acrylic dividers for a sleek, durable solution that’s easy to clean.
11. Spoons Organizer Ideas for Better Drawer Management
Cutlery organizers are essential for keeping spoons, forks, and knives neatly arranged. Expandable options are great for customizing to your drawer’s dimensions.
Tips & Tricks:
- Choose an organizer with non-slip grips to prevent it from sliding around.
- Organize cutlery by type: keep all spoons together, followed by forks and knives.
- Add a smaller section for specialty items like butter knives or cocktail spoons.
Pro Tip: Opt for a two-tiered cutlery organizer if you’re short on drawer space but have lots of utensils.
12. Storing Plates in Drawers Without Clutter
Storing plates in drawers is a modern and space-saving solution that makes it easier to access them compared to stacking them in cabinets. Deep drawers equipped with dividers or foam inserts are perfect for keeping your plates secure and scratch-free.
Tips & Tricks:
- Use padded dividers or pegs to separate plates and prevent shifting.
- Place heavier items like dinner plates at the bottom of the stack and lighter ones, like salad plates, on top.
- Arrange plates by size to keep things visually neat and practical.
Pro Tip: Look for drawer pegs that are adjustable so you can rearrange as needed when adding or removing items.

Popular Drawer Organization Ideas
| Drawer Type | Contents | Organization Tips |
|---|---|---|
| Utensil Drawer | Whisks, garlic press, thermometers | Use a utensil organizer; group items by type and frequency of use |
| Cutlery Drawer | Spoons, forks, knives | Use a spoons organizer; keep specialty items in a separate section |
| Plate Drawer | Dinner plates, bowls | Use dividers or foam inserts; arrange plates by size and weight |
Extra Tips for Organizing Kitchen Drawers
- Maximize Space with Stackable Trays: Stack trays within deep drawers to add an extra layer of organization for smaller items like measuring cups or bag clips.
- Label Hidden Compartments: For families or shared spaces, labeling inside drawers can ensure everyone knows where items go.
- Use Liner Mats: Non-slip mats keep items in place and protect your drawers from scratches or spills.
Why It Matters:
Organized drawers make daily tasks easier, save you time, and keep your kitchen looking neat. By investing in simple tools like dividers and organizers, you can transform chaotic spaces into functional hubs that meet your specific needs.
How to Best Organize Kitchen Cabinets
Organizing your kitchen cabinets is one of the most effective ways to create a functional and efficient cooking space. A well-organized cabinet setup saves time, reduces frustration, and ensures everything you need is always within reach. With a little planning and the right tools, you can transform your cabinets into streamlined storage spaces.
13. Where to Place Things in Kitchen Cabinets for Easy Access
Strategic placement is the key to efficient cabinet organization. Frequently used items should always be stored at eye level or in easily accessible spots. Reserve hard-to-reach shelves for items you use less often, like seasonal bakeware or specialty tools.
Tips & Tricks:
- Store everyday dishes and mugs in cabinets close to the dishwasher to make unloading easier.
- Use the back of cabinet doors to hang small tools, pot lids, or spice racks for added storage.
- Keep a “grab-and-go” shelf with essentials like lunch containers, snack bags, and water bottles for busy mornings.
Pro Tip: Organize by zones. For example, keep baking tools near your oven, plates near the dining area, and coffee mugs near your coffee maker.
14. Organizing Glasses in Kitchen Cabinets for Safety and Style
Glassware can be tricky to organize, but with the right system, you can keep your glasses safe, accessible, and visually appealing. Use sturdy, non-slip shelving to prevent accidents and maximize space.
Tips & Tricks:
- Store daily-use glasses on lower shelves for easy reach.
- Reserve the top shelves for special occasion glasses, like wine goblets or champagne flutes.
- Use stackable shelf risers to double your space for shorter glasses.
- Turn glasses upside down to keep them clean and free of dust, unless the rims are delicate.
Pro Tip: Group glasses by type and size for a uniform look that’s easy to navigate when you’re hosting guests.
15. Cabinet Setup Tips for a Streamlined Kitchen
A well-organized cabinet setup makes cooking and meal prep seamless. The key is to use smart storage solutions to make the most of your space while keeping everything tidy.
Tips & Tricks:
- Lazy Susans: Perfect for corner cabinets or deep spaces, lazy susans keep items like spices, oils, or condiments easily accessible.
- Stackable Organizers: Use stackable bins or shelves to make use of vertical space in cabinets.
- Pull-Out Shelves: Add pull-out or slide-out shelves to lower cabinets to prevent bending or reaching for heavy items.
- Labels: Label cabinet shelves to remind everyone where items belong and keep your system intact.
Pro Tip: If you’re short on cabinet space, consider adding under-shelf baskets or wall-mounted racks for overflow storage.

Cabinet Organization by Zones
To maximize efficiency, organize your cabinets based on the different tasks in your kitchen. Here’s a simple guide:
| Zone | Items to Store | Placement Tips |
|---|---|---|
| Cooking Zone | Pots, pans, baking sheets, cooking utensils | Near the stove and oven for quick access |
| Prep Zone | Cutting boards, knives, mixing bowls, measuring cups | Close to the countertop or island where you prep meals |
| Serving Zone | Plates, bowls, silverware, serving platters | Near the dining area or dishwasher for easy loading and unloading |
| Coffee/Tea Zone | Mugs, coffee beans, tea bags, sugar, coffee maker tools | Close to your coffee station or water source |
Extra Tips for Cabinet Organization
- Group by Frequency of Use: Keep the items you use daily at arm’s reach and place rarely used items higher or lower.
- Use Clear Containers: Store pantry goods or small items in clear containers to quickly see what’s inside.
- Add Cabinet Liners: Protect shelves from spills and scratches while making them easier to clean.
- Rotate Stock: When organizing pantry cabinets, rotate older items to the front to avoid waste.
Why It Matters:
A thoughtfully organized cabinet system not only saves time but also reduces stress during busy cooking sessions. By placing items where you need them most and incorporating simple tools like lazy susans and stackable bins, you’ll create a kitchen that’s both functional and inviting.
Organizing Glasses in Kitchen Cabinets for Safety and Style
When organizing your glassware, it’s important to prioritize both safety and functionality. A well-thought-out system not only prevents breakage but also adds a touch of style to your kitchen. With the right techniques, you can keep your glasses safe, accessible, and beautifully displayed.
Tips for Safe and Stylish Glassware Organization
- Store Frequently Used Glasses at Eye Level:
Place everyday glasses, like water and juice glasses, on an easily reachable shelf. This ensures they’re accessible and reduces the risk of accidental drops. - Use Higher Shelves for Special Occasion Glasses:
Store wine goblets, champagne flutes, or other delicate pieces on higher shelves. Use protective mats or dividers for extra safety. - Incorporate Shelf Risers for Extra Space:
Add stackable shelf risers to create an additional layer of storage for shorter glasses. This doubles your storage space while keeping everything organized. - Sort Glasses by Size and Purpose:
Group glasses by type—water glasses, mugs, stemware—to make finding the right one quick and easy.
Pro Tip: Use clear shelf liners to prevent glasses from slipping and to protect your shelves from scratches or spills.
Popular Glassware Storage Locations
| Item | Storage Location |
|---|---|
| Frequently used glasses | Easy-to-reach cabinet or shelf |
| Special occasion glasses | Higher cabinet with safe dividers |
| Travel mugs or tumblers | Drawer or lower cabinet |
Why It Matters: A well-organized glassware cabinet not only protects your items but also streamlines your daily routine. Plus, a stylishly arranged shelf can enhance the overall look of your kitchen!
Creative and Budget-Friendly Pantry Organization
An organized pantry can be a game changer for any kitchen. It saves time, minimizes food waste, and makes meal prep more enjoyable. With a little creativity and some affordable tools, you can create a pantry that’s both functional and visually appealing.
16. Clear Canister Decor Ideas to Save Space
Clear canisters are a versatile solution for storing dry goods like pasta, rice, and cereals. They add a touch of elegance to your pantry while making it easy to see what you have at a glance.
Tips & Tricks:
- Choose canisters with airtight seals to keep your food fresh longer.
- Use uniform canisters for a cohesive look and to maximize shelf space.
- Add chalkboard or preprinted labels for a polished and organized appearance.
Pro Tip: Store canisters with the most-used items at eye level for quick access.
17. Use Stackable Bins for Vertical Pantry Organization
Stackable bins are a great way to maximize vertical space in your pantry. They’re perfect for storing snacks, canned goods, and smaller items that tend to get lost.
Tips & Tricks:
- Choose transparent bins so you can see what’s inside without opening them.
- Assign specific bins to categories like “Snacks,” “Baking Supplies,” or “Canned Goods.”
- Use larger bins for bulky items like potatoes, onions, or bags of flour.
Pro Tip: Label your bins for easy identification and faster meal prep.
18. Label Containers for an Organized Look
Labels are the secret weapon of a well-organized pantry. They make it easy to locate what you need and keep everything looking tidy.
Tips & Tricks:
- Use a label maker for clean, professional labels or opt for chalkboard stickers for a rustic look.
- Include expiration dates on labels for items like grains or flours.
- Combine labeled containers with clear bins for the ultimate organized system.
Pro Tip: Use color-coded labels for different food categories to make organization even easier.
Extra Pantry Organization Ideas
- Rotating Turntables: Perfect for hard-to-reach corners, turntables keep spices, condiments, and small jars accessible.
- Wire Baskets: Use wire baskets to store root vegetables or larger snacks like chip bags.
- Door-Mounted Racks: Utilize pantry door space with hanging racks for spices, canned goods, or snack bags.
- Weekly Restock Station: Dedicate a small section to items you need to replenish weekly, like bread or fresh produce.
Why It Matters:
A well-organized pantry doesn’t just look great—it saves you time, reduces food waste, and makes cooking more efficient. With these budget-friendly ideas, you can create a pantry that’s both functional and stylish.

Ideal Kitchen Organization for Daily Use
A well-organized kitchen is essential for daily routines, making cooking, meal prep, and clean-up faster and more enjoyable. Small changes, like creating dedicated stations or using versatile tools, can make a big difference. Here are practical ideas to streamline your kitchen for everyday use.
19. Create a Coffee Station for Morning Efficiency
Kickstart your day with a dedicated coffee station that keeps all your essentials in one place. Whether you’re a coffee lover or a tea enthusiast, having a centralized spot for your morning routine simplifies your workflow and keeps your kitchen tidy.
How to Set Up a Coffee Station:
- Use a tray or small cart to group coffee beans, tea bags, sugar, and creamer.
- Include mugs, spoons, and napkins in the same area for quick access.
- Add a decorative touch with a small plant or sign to make the station inviting.
Benefits of a Coffee Station:
- Keeps coffee-related items organized and within easy reach.
- Reduces clutter in other parts of the kitchen.
- Can be customized with extras like a milk frother, flavored syrups, or a travel mug station.
Pro Tip: Store coffee pods or filters in a clear container to keep them visible and accessible.
20. Use Turntables for Hard-to-Reach Corners
Turntables, also known as lazy susans, are a must-have for maximizing storage and accessibility. These spinning trays make it easy to grab items stored in hard-to-reach spots, whether in cabinets, pantries, or countertops.
Best Uses for Turntables:
- Store frequently used items like spices, oils, and vinegars.
- Keep condiments organized in the refrigerator or on the dining table.
- Use them in deep pantry shelves or corner cabinets to avoid losing items in the back.
Tips & Tricks:
- Choose a two-tiered turntable for small spaces to double your storage capacity.
- Use non-slip turntables to keep items stable, especially for glass jars or bottles.
- Dedicate separate turntables for cooking essentials and baking supplies.
Pro Tip: Add labeled dividers to your turntable to group similar items for even easier access.
21. Spinning Cabinet Organization for Small Spaces
If you’re working with limited kitchen space, spinning trays can transform cramped cabinets into functional storage areas. These trays allow you to make the most of every corner and ensure that no item is out of reach.
How to Use Spinning Trays:
- Place one in a corner cabinet to store small appliances like a blender or food processor.
- Use a spinning tray in the pantry to organize jars, cans, or snack containers.
- Add one to an under-sink cabinet for cleaning supplies, making it easy to access sprays, sponges, and dish soap.
Pro Tip: Look for spinning trays with adjustable heights to accommodate larger items or different shelf configurations.
Recommended Products for Daily Kitchen Organization
| Product | Price | Benefits |
|---|---|---|
| Stackable Bamboo Drawer Organizers | $20 | Maximizes drawer space, keeps items organized, and offers a natural, stylish look |
| Acrylic Shelf Risers | $15 | Provides additional storage space and keeps items visible and easy to grab |
| Two-Tier Lazy Susan | $25 | Doubles storage capacity while keeping everything accessible in small spaces |
| Coffee Pod Organizer | $10 | Keeps coffee pods neatly arranged and visible for a clutter-free coffee station |
Additional Tips for Daily Kitchen Efficiency
- Group Items by Use: Store frequently used items like cutting boards, knives, and mixing bowls in one area for easy prep.
- Clear Countertops: Keep only essentials like a coffee maker or fruit bowl on your counters to reduce visual clutter.
- Use Vertical Space: Install wall-mounted organizers for utensils or spices to free up drawer space.
- Add a Meal Prep Basket: Dedicate a basket for meal prep items like peelers, measuring spoons, and mixing spatulas for quick access during busy days.
Why It Matters:
A kitchen optimized for daily use makes cooking more enjoyable, reduces frustration, and keeps your space looking tidy. With simple tools like turntables and coffee stations, you’ll create a kitchen that supports your routine and feels like a joy to work in.
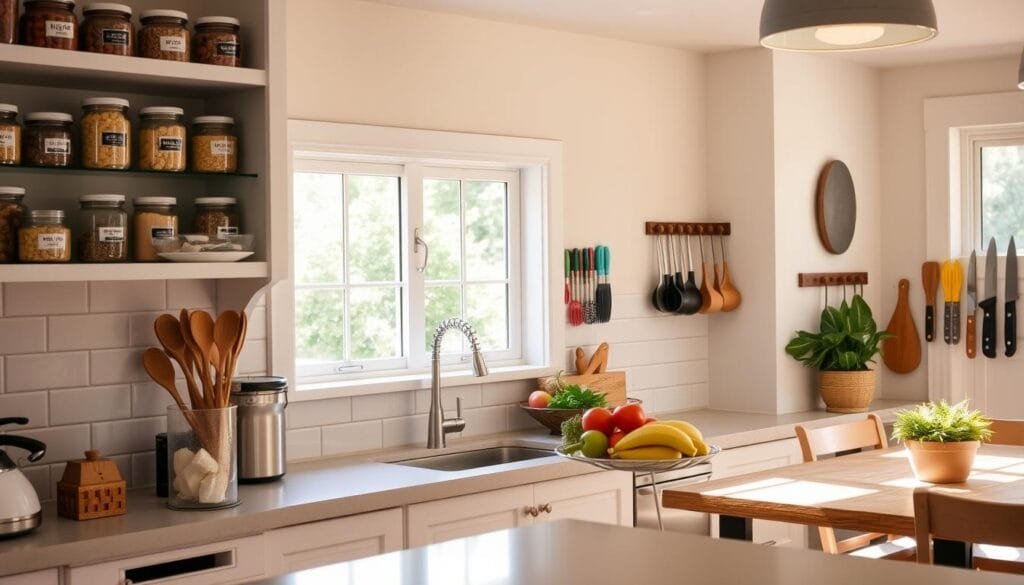
Organizing Servingware for Entertaining
When it comes to entertaining, having your servingware organized and accessible is essential. From elegant platters to delicate bowls, using the right strategies will ensure your kitchen stays efficient and stylish. A well-organized system not only protects your items but also makes hosting a seamless and enjoyable experience.
22. Store Serving Platters Upright for Easy Access
Serving platters can be bulky and awkward to store, but keeping them upright is a game changer. This approach saves space, protects delicate edges, and makes it easy to grab the platter you need without shifting heavy stacks.
Tips & Tricks:
- Install vertical dividers in a lower cabinet or pantry to create slots for platters.
- Use tension rods as an affordable alternative to store platters securely.
- Line the base of the cabinet with felt or silicone mats to prevent slipping and scratching.
Pro Tip: Dedicate a section for frequently used platters and another for special occasion pieces.
23. Stack Bowls and Plates by Size for Better Organization
Keeping bowls and plates neatly stacked not only maximizes space but also creates a visually appealing arrangement. Grouping them by size ensures stability and makes it easier to find the right piece.
Tips & Tricks:
- Use cabinet shelf risers to stack smaller sets of bowls and plates separately, doubling your vertical storage space.
- Store everyday dishes at the front and more decorative or seasonal pieces toward the back.
- Add a non-slip liner or felt pads between delicate pieces to prevent damage.
Pro Tip: For open shelving, opt for matching or neutral-colored sets to create a cohesive and stylish display.
24. Use Dividers to Keep Servingware Safe
Dividers are the ultimate solution for keeping fragile servingware like crystal bowls, porcelain platters, or delicate trays safe. They help maintain order and protect items from chipping or breaking.
Tips & Tricks:
- Install adjustable dividers in deep drawers or cabinets for a customizable fit.
- Use padded or felt-lined dividers to add an extra layer of protection for glass or ceramic items.
- Consider stackable divider trays for smaller serving pieces like butter dishes or gravy boats.
Pro Tip: Label divider sections for items like “Appetizer Trays” or “Dessert Bowls” to make setup for entertaining quick and easy.
Servingware Organization by Type
| Item | Storage Tip |
|---|---|
| Serving Platters | Store upright using vertical dividers |
| Bowls and Plates | Stack by size, use shelf risers for layers |
| Delicate Items | Use padded dividers or felt-lined trays |
Extra Tips for Organizing Servingware
- Group by Occasion: Keep everyday servingware separate from seasonal or formal pieces for easier access.
- Use Baskets or Bins: Store smaller items like napkin holders, coasters, or condiment dishes in labeled baskets to avoid clutter.
- Maximize Drawer Space: Use deep drawers for servingware and add dividers to organize larger pieces like trays or salad bowls.
- Rotate Seasonal Items: Store holiday-themed servingware in a less accessible spot during off-seasons to free up space.
Why It Matters:
A well-organized servingware system makes entertaining stress-free and enjoyable. By using dividers, vertical storage, and grouping items by size, you’ll protect your cherished pieces and always have them ready to shine during gatherings.
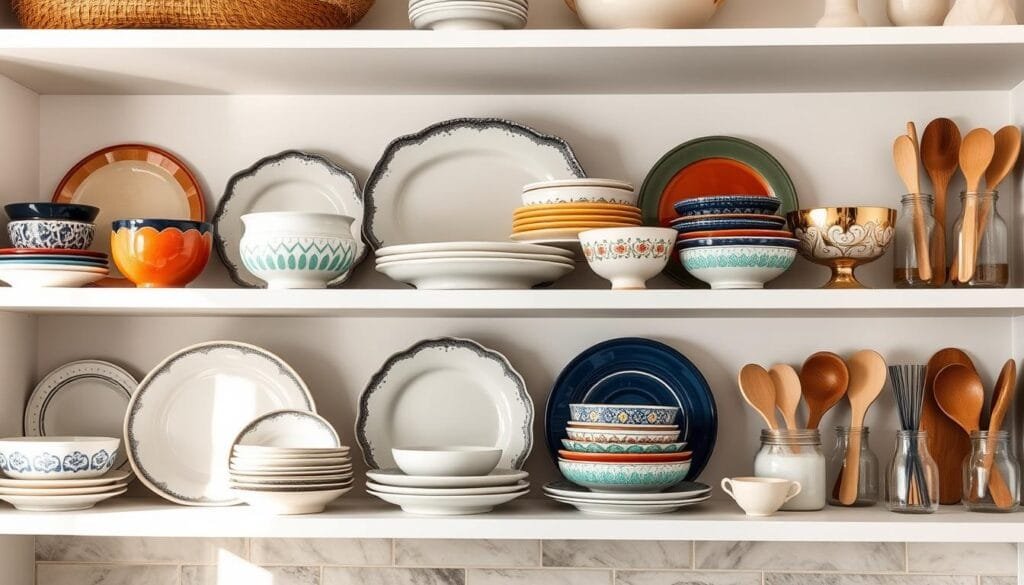
Maximizing Space in Corner Cabinets
Corner cabinets often feel like wasted space, but with the right strategies, they can become some of the most functional and efficient storage areas in your kitchen. By utilizing smart solutions like lazy susans, pull-out shelves, and adjustable shelving, you can transform these awkward spots into organized and accessible storage zones.
Benefits of Corner Cabinet Organization
- Increased Storage Capacity: Efficiently use every inch of your kitchen by optimizing corner cabinets.
- Easier Access to Items: Smart tools like pull-out shelves make even the deepest corners accessible.
- Improved Kitchen Efficiency: No more searching for lost items—well-organized cabinets save time and reduce stress.
- Enhanced Aesthetic Appeal: An organized corner cabinet adds to the overall look and functionality of your kitchen.
25. Use Lazy Susans for Corner Cabinets
Lazy susans are a classic solution for corner cabinets, offering a rotating platform that makes it easy to grab items stored in the back. They work particularly well for round or smaller items.
Tips & Tricks:
- Use a two-tier lazy susan in upper corner cabinets to store spices, oils, and small jars.
- Choose a non-slip lazy susan to keep items from sliding during rotation.
- Dedicate one lazy susan for baking supplies and another for frequently used condiments.
Pro Tip: For deep lower cabinets, use a heavy-duty lazy susan to hold larger items like cleaning supplies or small appliances.
26. Install Pull-Out Shelves for Easier Access
Pull-out shelves are a game-changer for corner cabinets, turning deep, hard-to-reach spaces into fully accessible storage areas. They’re ideal for storing heavy or bulky items.
Tips & Tricks:
- Use pull-out shelves for pots, pans, and mixing bowls to avoid lifting and reaching.
- Opt for tiered pull-out shelves to create layers of storage for smaller items like food containers or lids.
- Add a soft-close mechanism to prevent slamming and protect delicate items.
Pro Tip: For added organization, combine pull-out shelves with clear bins to group similar items together.
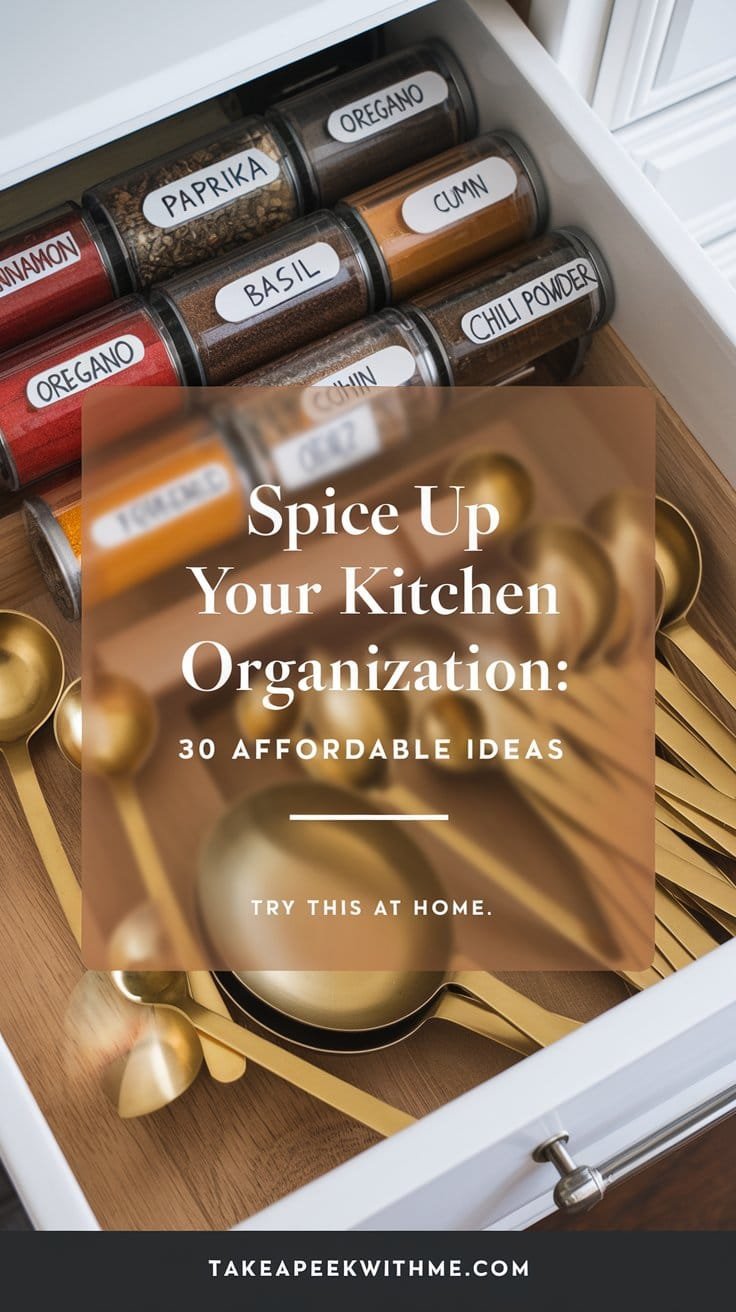
27. Make Use of Adjustable Shelving
Adjustable shelves allow you to customize cabinet space to accommodate items of varying heights and sizes. They’re perfect for kitchens where storage needs change frequently.
Tips & Tricks:
- Adjust shelf heights to fit tall bottles, cereal boxes, or stacked containers.
- Use small baskets or bins on adjustable shelves to keep items neatly grouped and easy to pull out.
- Reconfigure shelves seasonally to store holiday cookware or extra serving pieces as needed.
Pro Tip: Label each shelf or bin to keep your organization system intact and easy to maintain.
Popular Tools for Corner Cabinet Organization
| Tool | Best Use | Benefits |
|---|---|---|
| Lazy Susan | Spices, oils, condiments | Easy rotation, accessible storage |
| Pull-Out Shelves | Pots, pans, mixing bowls, food containers | Full access to deep spaces, reduces strain |
| Adjustable Shelving | Tall bottles, seasonal items, bulky cookware | Customizable storage, maximizes vertical space |
| Corner Drawer Inserts | Utensils, small gadgets | Keeps smaller items neat and accessible |
Extra Tips for Maximizing Corner Cabinet Space
- Think Vertically: Use stacking bins or tiered racks to make the most of vertical space.
- Use Light: Add LED lights or motion-sensor lighting inside corner cabinets for better visibility.
- Rotate Stock: Periodically reorganize corner cabinets to ensure items are used and not forgotten.
- Install Door-Mounted Racks: Attach racks to the inside of corner cabinet doors to store smaller items like lids, cutting boards, or spices.
Why It Matters:
Corner cabinets don’t have to be frustrating or inefficient. With solutions like lazy susans, pull-out shelves, and adjustable shelving, you can turn these tricky spaces into valuable storage areas. By implementing these tips, you’ll create a kitchen that’s organized, functional, and a pleasure to use.
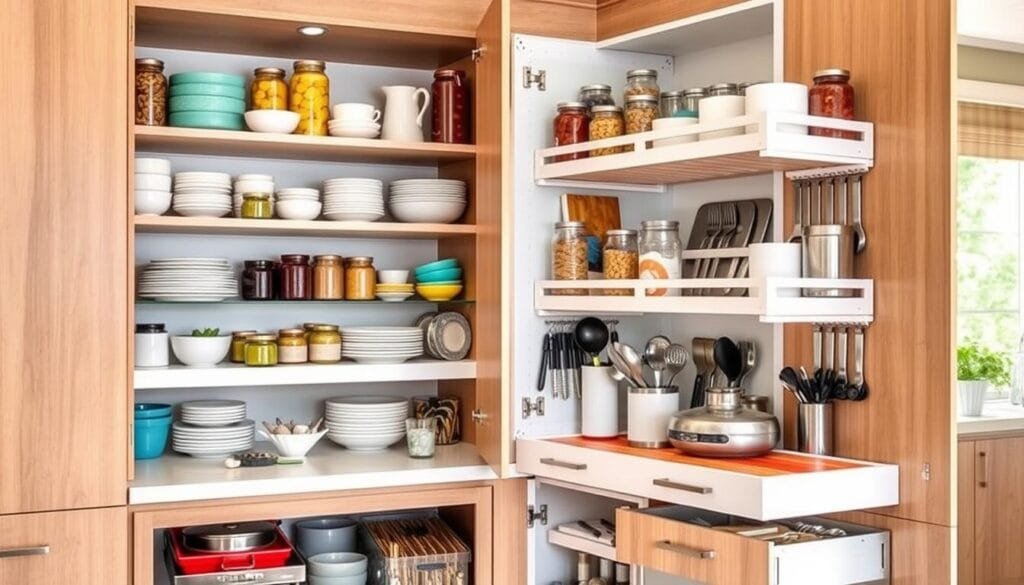
Organizing Kitchen Tools and Gadgets
Keeping your kitchen tools and gadgets organized is key to a functional and enjoyable cooking space. With the right strategies, you can reduce clutter, save time, and make your kitchen more efficient. By grouping tools by purpose, storing appliances wisely, and using creative storage solutions, you’ll ensure everything has its place.
28. Group Small Appliances by Frequency of Use
Small appliances can quickly clutter up countertops and cabinets if not stored thoughtfully. The key is to organize them by how often you use them.
Tips & Tricks:
- Keep frequently used appliances, like your coffee maker or toaster, on the countertop for easy access.
- Store less-used appliances, such as slow cookers or waffle makers, in lower cabinets or a pantry.
- For seasonal appliances, like ice cream makers, designate a spot in a storage closet or upper cabinets.
Pro Tip: Use appliance covers to keep frequently used items clean and dust-free while adding a decorative touch.
29. Use Drawer Liners to Keep Utensils in Place
Drawer liners are a simple yet effective solution for keeping your utensils and gadgets tidy. They not only prevent sliding but also protect drawer surfaces from scratches and spills.
Tips & Tricks:
- Choose non-slip liners for utensils to ensure everything stays in place.
- Opt for washable liners to make cleaning up spills or crumbs a breeze.
- Pair drawer liners with dividers or small bins to group items like measuring spoons, can openers, and peelers.
Pro Tip: Use clear or neutral-colored liners for a clean and cohesive look inside your drawers.
30. Hang Larger Tools on a Pegboard for Easy Access
Bulky tools, such as rolling pins, colanders, or strainers, can take up valuable cabinet space. A pegboard is a practical and stylish solution for hanging these larger items while keeping them within reach.
Tips & Tricks:
- Install a pegboard on an unused kitchen wall, the side of a cabinet, or inside a pantry door.
- Use hooks to hang tools by size, ensuring heavier items like cast iron lids are on sturdier pegs.
- Paint or customize the pegboard to match your kitchen’s style for a functional yet decorative feature.
Pro Tip: Add small shelves or baskets to the pegboard to store smaller items like spice jars or kitchen scissors.
Practical Tips for Organizing Kitchen Tools
- Declutter Regularly: Go through your tools periodically and remove duplicates, broken gadgets, or items you rarely use.
- Use Clear Containers: Store small gadgets like cookie cutters or measuring cups in clear bins for easy visibility.
- Label Everything: Label bins, baskets, and shelves to keep your system organized and easy to maintain.
- Think Vertical: Use wall space for hanging tools or mounting magnetic strips for knives and metal utensils.
Popular Kitchen Tool Storage Solutions
| Storage Solution | Best Use | Benefits |
|---|---|---|
| Drawer Liners | Utensils, measuring spoons, small tools | Prevents sliding, protects drawer surfaces |
| Pegboards | Rolling pins, colanders, strainers | Frees up drawer space, keeps large items accessible |
| Appliance Storage Bins | Seasonal or less-used appliances | Keeps appliances organized and easy to retrieve when needed |
| Magnetic Strips | Knives, metal utensils, or lids | Saves drawer space, keeps items within easy reach |
Extra Tips for Kitchen Tool Organization
- Create a Gadget Zone: Dedicate a specific drawer or shelf for smaller kitchen tools like vegetable peelers, zesters, or tongs.
- Use Adjustable Shelves: Add adjustable shelves to cabinets for storing appliances of varying sizes.
- Invest in Stackable Bins: Stackable bins or baskets can be used inside cabinets to maximize vertical space.
- Rotate Stock: Store seasonal tools and appliances separately to avoid overcrowding your everyday items.
Why It Matters:
An organized kitchen isn’t just about aesthetics—it’s about creating a space that works for you. By grouping small appliances, using drawer liners, and installing pegboards, you’ll not only save space but also make cooking more enjoyable. Regular maintenance ensures your kitchen stays efficient and clutter-free, turning it into a place you’ll love to use every day.
Ready to Transform Your Kitchen?
A well-organized kitchen is more than just a tidy space—it’s the heart of a functional, stress-free home. By decluttering, using creative storage solutions, and optimizing every inch of your kitchen, you can create a space that works for you every day. Whether it’s grouping appliances by frequency, organizing servingware for entertaining, or maximizing corner cabinet space, these tips ensure your kitchen is efficient, stylish, and ready for anything.
Start small—focus on one drawer, cabinet, or section at a time. Over time, these changes will add up to a kitchen that’s a joy to cook in and a pleasure to show off. With a little effort and creativity, you’ll find that an organized kitchen isn’t just a dream—it’s an achievable reality.
What’s your favorite kitchen organization tip from this guide? Share your thoughts or let us know how you’ve transformed your kitchen!


